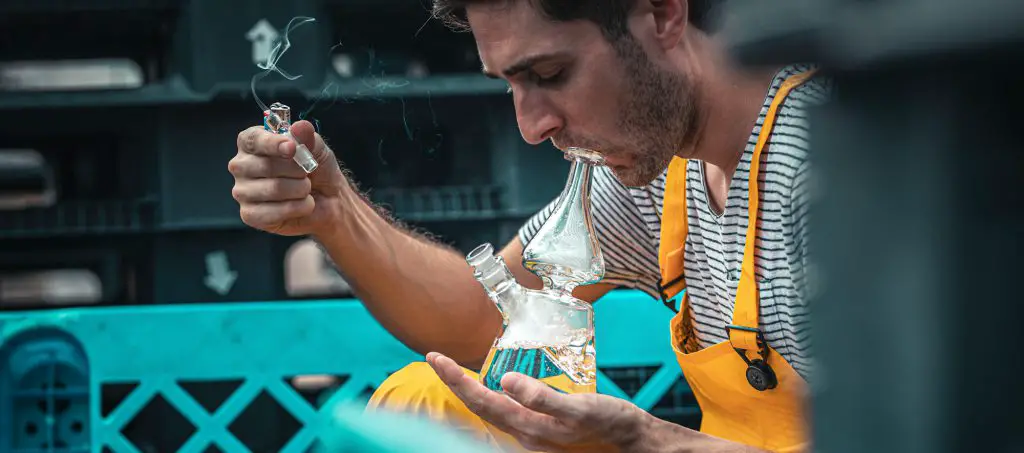
Bongs are prized for their clean, smooth, and ultra-powerful hits. On the flip side, they can get dirty and stinky – really fast. Without regular cleaning and maintenance, you’ll soon be inhaling dirt and toxins instead of cannabinoids and terpenes. You do not only waste precious weed but also put your health at risk.
In this article, you’ll learn all you need to know about cleaning, maintaining and storing marijuana bongs.
Page Content
- Why Clean & Maintain Marijuana Bongs
- How To Clean Bongs
- Step 1: Ready The Supplies
- Step 2: Dump The Dirty Water
- Step 3: Disassemble The Bong
- Step 4: Rinse Everything With Water
- Step 5: Place Each Part In A Separate Container
- Step 6: Shake Each Container
- Step 7: Clean The Bong
- Step 8: Cover All the Holes And Openings In The Bong
- Step 9: Shake The Bong Vigorously
- Step 10: Rinse Everything
- How To Maintain & Keep Bongs In Top Condition
Why Clean & Maintain Marijuana Bongs
Cleaning the bong sounds like a lot of work. It can be tempting to skip it – but don’t. It is a surefire way of attracting all sorts of problems. Do it like clockwork, on the other hand, and you’ll bring in rewards that will make all the time and effort more than worth it.
Here are the top reasons why you should clean and maintain your bong regularly.
Cleaner, Aromatic & Better-Tasting Smoke
A freshly-cleaned bong lets you enjoy the distinct fragrance and flavor of your chosen marijuana strain. It is clean and free from contaminants, too.
If you don’t clean the bong, the ashy residue will build up inside its walls. It is what you’ll end up combusting – not the fresh flowers you just packed into the bowl. This – coupled with the fetid, stagnant water – will produce a smoke that tastes and smells just as revolting. To make matters worse, the polluted smoke can also irritate the airways.
Cooler, Smoother Hits
Bongs are known for their velvety smooth hits. That is because the water helps cool down the smoke, making it gentler on the throat and lungs. The smoke, though, won’t get filtered properly if the bong has dirty water or clogged perc. In turn, what you pull is a harsh cloud that will make you cough or even tear up.
Stronger, Faster-Acting High
If you use a dirty bong, it will probably take a while before you feel a noticeable buzz. Again, that is because you’re smoking the leftover dregs from the previous toking sessions – not the fresh herbs. Really, you’ll only end up wasting that top-shelf weed at this point.
Clean out the bong, and you’ll get stoned a lot faster. More importantly, the high will be just as insanely potent as you want it to be.
Keeps The Bacteria And Fungi At Bay
Stale water can be a breeding ground for bacteria and fungi. Eventually, you may notice a slimy film, spots, or discolorations on the glass. Aside from being foul-smelling, the bong water will also turn brown and murky. Gross, right?
Even worse, inhaling bacteria and fungi can also lead to health problems. You might wind up with bronchitis, pneumonia, emphysema, and other respiratory issues. Don’t risk it.
How To Clean Bongs
Cleaning a bong is simple. It does require time, effort, and patience. Follow every step to the letter, and the bong will look brand-spanking new by the time you’re done.

Note: This procedure only focuses on glass bongs.
Step 1: Ready The Supplies
Before getting started, gather all the supplies in the workstation. Aside from the dirty bong, here’s what you’ll need:
- Hot water
- Isopropyl or rubbing alcohol
- Salt
- Cup (for measurement)
- Tablespoon (for measurement)
- Containers or resealable plastic bags
- Heat-resistant rubber gloves
- Hand towels
- Rubber bands
- Cotton balls or beaker stoppers
- Cotton buds or swabs
- Bottle brush or pipe cleaners (optional)
Step 2: Dump The Dirty Water
If filthy water is still sitting inside your bong, pour it out now.
Step 3: Disassemble The Bong
After emptying the bong, take it apart. Start by detaching the bowl and the downstem. Separate all the other removable parts. Do this with extreme care. Remember, bongs may be durable, but they are prone to breakage.
Step 4: Rinse Everything With Water
Rinse each piece with hot water to help dislodge the gunk and resin inside. Do wear heat-resistant rubber gloves to avoid scalding. Add the hot water from the top, then pour it out from the side opening. It ensures that the residues will not get trapped anywhere else.
Step 5: Place Each Part In A Separate Container
Place each component – except for the bong itself – inside a clean container or resealable plastic bag. Pour about 1/4 cup of rubbing alcohol in each one. Add a tablespoon of salt as well. For larger pieces, you can double the amount of alcohol and salt.
How will it work? Rubbing alcohol will help break down the buildup resin inside the bong. Salt, on the other hand, is an abrasive that helps scrub out the dregs.
Step 6: Shake Each Container
Put a lid on the container or reseal the plastic bag. Shake it vigorously. Doing so allows the alcohol and salt to get into every nook and cranny of the bong parts. Keep at it for about five minutes – or even more. Rest every couple of minutes if you want.
After shaking, each component should be fully coated with alcohol. Let them sit for ten to fifteen minutes before shaking a bit more. If the bong has accumulated years of resin buildup, you may have to repeat this process several times.
Step 7: Clean The Bong
Once the individual pieces are spick and span, it is time to clean the bong itself.
Add three tablespoons of salt into the bong. If it is large or has an elaborate structure, you can add four to five tablespoons. Pour half a cup of rubbing alcohol into the bong. Depending on the height and size, you may have to add more. At this point, the salt to alcohol ratio is not important.
Step 8: Cover All the Holes And Openings In The Bong
Use clean hand towels to plug the openings in the bong. Secure it with rubber bands. For small holes, use cotton balls instead. To make your life easier, consider buying beaker stoppers from a local chemistry supplies store. It is pretty cheap, anyway.
Otherwise, cover the carb hole with a finger, then place your hand atop the mouthpiece.
Step 9: Shake The Bong Vigorously
Once every hole is sealed, start shaking the bong so the solution can enter all the tiny coils and crevices. Do it for five minutes. Take a break. Then go jiggle it some more.
Step 10: Rinse Everything
Pour out the alcohol and salt solution. Put on the rubber gloves again. Rinse the bong and the smaller pieces with hot water to get rid of the alcohol and salt, as well as the lingering resin and gunk. Use a bottle brush or pipe cleaner to remove any stubborn goo. You can use cotton buds as an alternative.
Once everything is spotless, do one final rinsing with hot water. This time, use filtered hot water. Set aside. Allow them to air-dry before use or storage.
How To Maintain & Keep Bongs In Top Condition
If you haven’t cleaned your bong for months or years, you might have to repeat the above process several times to peel away all the layers of stains and residues. It can get tedious, for sure.

The solution is a no-brainer – clean your bong as often as possible. In time, it might only take you a few minutes or a simple rinsing to get the bong squeaky-clean. Pair it with preventive measures, and you’ll have a functional and reliable water pipe that will last for years. Talk about getting more bang for your buck.
Clean The Bong Regularly
The cleaning schedule may depend on how often you use the bong. Daily smokers should clean it at least every 48 hours. If you used it first thing on Monday, for instance, give it a good washing and scrubbing after smoking on Wednesday morning. Alternatively, you can clean it on Tuesday night before going to bed. You do you.
Note: Do toss out the bong water after the smoke session. Using clean water daily helps prevent the formation of molds, which can leave stains that are near impossible to remove.
For casual smokers, clean after every use. You don’t want to leave the bong as it is for days or weeks on end. That is a sure way for bacteria and fungi to grow. It is also enough time for the sticky muck to amass and harden.
Try To Use Only Filtered Water
Over time, unfiltered tap water can leave stains in the bong due to the mineral content. And if you’re not the type to clean the pipe regularly, the water stains may build up, becoming increasingly harder to remove. Using only filtered water can help avoid these discolorations. If possible, use filtered water to clean the bong as well. Otherwise, just use filtered water for the final rinsing.
Remove The Stains Right Away
The moment you see stains, remove them without delay. As mentioned, they’ll be a pain to clean once they accumulate. For persistent marks, pour some vinegar into a bowl and swish for a couple of minutes. Let it sit for a few minutes. Once done, rinse with hot water. Let it dry.
Aside from vinegar, lemon juice also does wonders. Combine it with hot water and repeat the above steps.
Add Some Lemon To The Water While Smoking
The next time you smoke, consider adding two drops of lemon juice to the bong water. It prevents the nasty gunk from forming inside the bong while breaking down the existing residues. It also keeps the water fresh-smelling.
Don’t add too much lemon juice, though. It can affect the aroma and flavor of the strain.
Store The Bong Empty
This is obvious. Dump that grimy water after every toking session. Ensure that the bong is clean, dry, and empty before storing it.
Keep The Bong In A Safe Spot
Make sure that the bong is out of harm’s way. Remember, never leave it out in the open. Chances are, it will drop and break if you knock it over. For extra protection, stow it inside a padded bong bag or a hard case. These, by the way, are a must if you plan to travel with your glass pipe.


Yes a clean bong is key to the best high ever! Excellent tips!