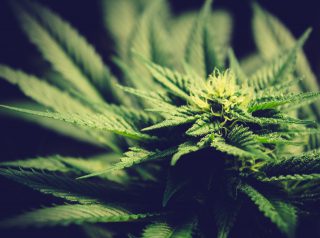
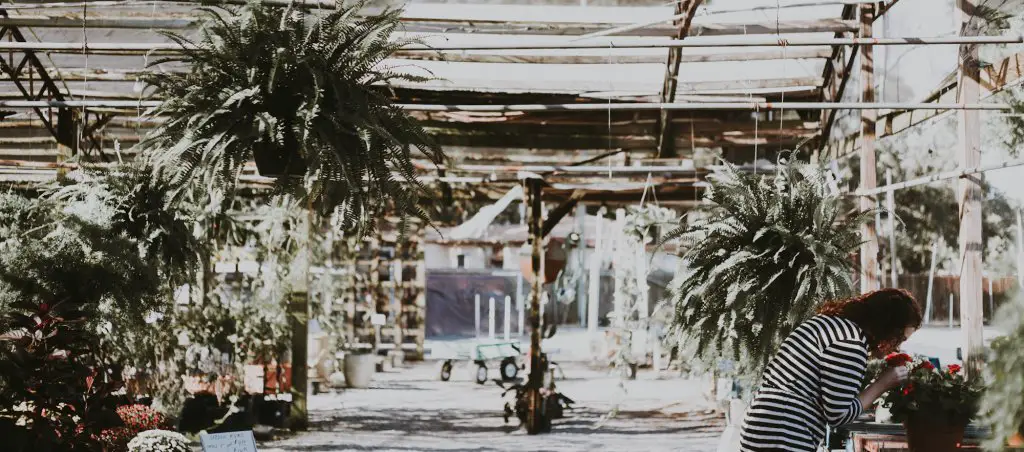
Coco coir is one of the most popular soilless media and perfectly suitable for hydroponics. It boasts many qualities that are not only beneficial for the plants but also to growers and the environment. It promises a straightforward and highly rewarding experience, keeping plants robust and productive, resulting in top-quality buds.
What is so special about coco coir? Here is all you need to know – including what it is, why use it, where to get it, and how to use it for maximum results.
Page Content
Coco Coir: Everything You Need To Know
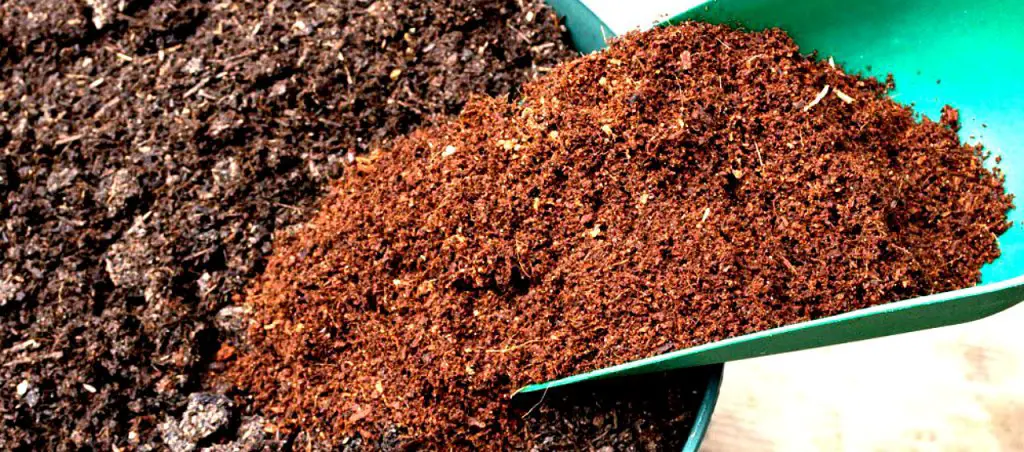
Coco coir comes from coconut husks – the fibrous material inside coconut shells. It may be brown or white. For gardening, brown coir – sourced from mature coconuts – is more commonly used. It is less flexible than white but sturdier.
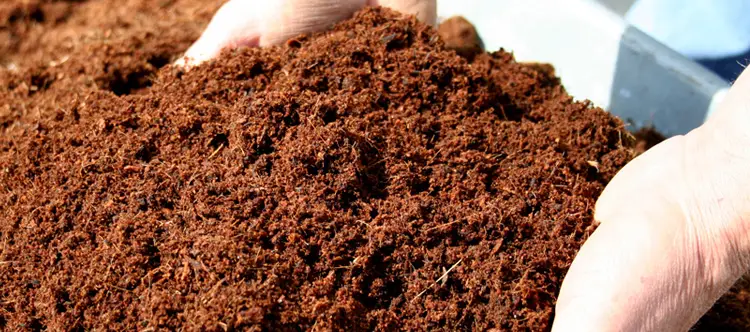
To soften the coir and make it easier to remove from the fruit, the husks are soaked in salt or freshwater. After which, it is allowed to dry for over a year, arranged into bales, then cut into various shapes. The final product may be sold in loose, brick, or ground forms.
Coco coir can be used on its own or combined with other growing media – such as perlite, vermiculite, and peat moss – to form a soil-free mix. It may also be used as a soil additive to boost drainage, aeration, and water retention. Lastly, it can act as jiffy pellets to house cuttings and seedlings.
Why Use Coco Coir
Coco coir boasts many qualities that make it a cut above other growing media. From its texture to sterility to convenience, here are the reasons why you should grow cannabis plants in coco.
pH Level
Coco coir has a nearly neutral pH level that falls between 5.2 to 6.8. This range does not interfere with the breakdown of the nutrient solutions in the medium, making essential minerals more accessible to the plants. Not to mention, it is also close to 5.5 to 6.5 – the recommended pH values for hydro systems.
Porosity & Aeration
Coco coir is incredibly porous, its surface teeming with millions of micro-sponges. Such a texture offers excellent aeration properties. Not only does it provide ample oxygenation at the roots, but it also ensures that the thriving root system has all the space it needs to expand. It results in faster growth and more vigorous root development.
Water-Holding Capacity
Coco coir’s sponge-like structure makes for a highly absorbent and retentive medium. In fact, it can hold up ten times its dry weight when sopping wet, ensuring that the root zone will never dry out.
Drainage Ability
Water retention is advantageous – to a certain extent. If a medium holds too much moisture, the roots may drown and become deprived of oxygen and nutrients.
For healthy plant growth, the substrate should drain out excess water, keeping the moisture at optimal levels at all times. Coco coir is water retentive with a 70:30 water-to-aeration ratio, and it drains well, helping prevent both under and over-watering problems.
Inert
Coco coir is inert and contains no nutrients and beneficial microbes. This quality makes it easy to regulate the pH at the roots and to customize the nutrient levels provided to the plants. Being inert is also an important consideration for hydroponic systems.
Coco can promote the growth of friendly microorganisms due to high reserves of lignin – a complex polymer found in its woody tissues. Two beneficial microbes that benefit from this medium are:
- Trichoderma. It promotes growth while also warding off harmful bacteria and pests.
- Mycorrhizae. These organisms help keep the roots healthy and resilient, as well as aids in nutrient and water uptake, among others.
Cleanliness & Sterility
Coco coir is sterile and does not contain any weed seeds, pathogens, and other damaging microorganisms. You do not have to worry about passing off diseases to the plants. It can also be reused as long as it is properly prepared beforehand.
Ease Of Use
Coco coir can easily be mistaken as soil, as both are brownish and have the same loose, crumbly texture. Appearance aside, growing is also similar except for the need to add nutrients. Anyone accustomed to growing plants in soil should not experience any difficulty with coco. It does not even take beginners much to grasp the ins and outs fully.
Coco can also be considered a hybrid between soil and hydroponic growing. It allows you to have a glimpse of how hydro systems work even without investing in any equipment.
Durability
Coco coir, despite being lightweight, is a sturdy material that lasts for a long time. It is also resistant to rot and fungus, further enhancing its durability.
Cost-Effectiveness
Coco coir may seem expensive at first but consider too that it is reusable and durable. There is no need for frequent replacements, making it cost-effective in the long term.
Sustainability & Eco-Friendliness
Coco coir is sustainable and environmentally-friendly. Coconuts, after all, are an abundant renewable resource. A single tree alone produces about 150 coconuts annually, which means that the raw material will never run out. Not to mention, coco coir is also sourced from the fruit component that, until recently, was considered a waste product. Furthermore, it is biodegradable.
Things To Keep In Mind When Using Coco Coir
Although teeming with appealing traits, growing in coco coir still has a few drawbacks. Knowing these allows you to maximize its use and ensure the health and vigor of the plants.
Needs Rinsing Before Use
Coco coir is clean and sterile. Still, you will have to wash it beforehand to get rid of dust or excess salts. It typically comes in dry and compressed forms, which is not viable for growing. In that regard, a good dousing not only purges the substrate of unwanted material but also preps and hydrates, allowing it to support the plants better. This rinsing procedure is easy enough to do.
May Need More Frequent Watering
Due to its high drainage ability, you may need to hydrate coco coir more often – even much more so than soil. Still, it is a small price to pay for its excellent structure and air to water volume.
Requires Additional Supplementation
Coco coir has a high cation exchange capacity (CEC), which measures how much nutrients a medium can hold before they start leaching out. As such, it can store and release the nutrients as needed. The high CEC makes coco naturally rich in potassium and sodium, but lacking in calcium (Ca) and magnesium (Mg). Worse, it tends to retain Ca and Mg, which may cause the plants to become deprived of these two nutrients. The only way to avoid this issue is to enrich it with Cal-Mag supplements before every use.
Prone To Mineral Buildup
Due to its excellent water retention, coco coir tends to accumulate salt and minerals. Hence, always monitor the pH level and be careful not to overfeed the plants to avoid nutrient lockout. You may also have to flush the plants a few times during the grow to cleanse the media and keep the roots healthy.
Where & How To Buy Coco Coir
Coco coir is widely available online and in local gardening stores. The downside to its rising popularity, though, is that the market is now getting saturated with substandard products. That said, do your research beforehand to single out the reputable brands. You may also want to talk to other growers for their recommendations and experience with specific products. At any rate, the company needs to be transparent about its manufacturing process.
Ultimately, the goal is to find a brand that sells coco coir with the following qualities:
- Aged Correctly. If the coco has not been aged adequately, the resulting fibers will not be as sturdy and durable.
- Properly Washed, Dried And Prepared. Some low-quality coco has been soaked in saltwater, but not correctly rinsed afterward, which means that it may contain harmful levels of salt. Others might have been treated with harsh chemicals during the drying process or exposed to steam for sanitizing. Both can degrade the quality of the coir.
- In Brick Form. Coco coir that comes in bricks or blocks is ideal when growing cannabis plants, as it is durable, affordable, and easy to prepare and condition. Some poor-quality brands, however, may compress too much dust into the bricks. These are only fillers and will have to be removed before use, leaving you with fewer coco fibers to work with.
- Properly Packaged, Stored & Shipped. Most coco coir is stored for years before being sold. In this case, the brand needs to have excellent storage methods to prevent the growth of damaging microorganisms. Being well-packaged also ensures that the coco will not become too crumbly and dusty during transit.
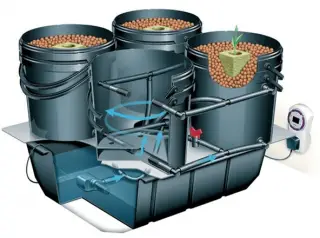
How To Use Coco Coir
Coco coir needs to be rinsed before use. Afterward, the medium is buffered, which involves immersing it in a solution with a Cal-Mag supplement. This step ensures that the plants will not suffer from deficiencies. For the final step, you can mix the coco with the preferred medium. Most cannabis growers swear by the coco coir and perlite combo.

Step 1: Rinsing & Rehydrating
- Take out the coco coir brick.
- Place the desired amount of medium in a 5-gallon bucket. Any large enough container that will facilitate easy mixing will do.
- Set the pail under a faucet, then gradually fill it with running tap water.
- While filling the container, stir the mixture thoroughly. Grab the fibers and squeeze it firmly to ensure that water can saturate it.
- Once done, set it aside.
Step 2: Preparing The Buffering Solution
- Take another empty 5-gallon bucket, then fill it with tap water.
- Ready the Cal-Mag supplement. Read the instructions manual carefully for the suggested dosage. In general, every gallon of water will need 7.5 ml of nutrients.
- After adding the nutrients, check the electrical conductivity (EC) and the pH level of the solution. The EC should sit between 1200 to 2000, while the pH should be greater than 6.2.
- Stir.
Step 3: Straining Out The Material
- Place a fabric pot or container inside an empty bucket. Set aside.
- Use a 1/8″ mesh screen or a perforated strainer to scoop out the dripping coco from the second bucket.
- Run some water over the material, preferably using a hose, faucet, or showerhead. Doing so will flush out any dust particles, as well as the coco peat or pith. The latter refers to the finely ground coco husks, which are too absorbent and moisture-retentive to be used for cannabis plants.
- After filtering out the small fragments, only the large coco fibers should remain. Toss the rehydrated coco into the third bucket (the one lined with the fabric pot).
- Repeat steps 2-3 as needed until you have transferred every bit of the medium to the third container.
Step 4: Buffering
- Pour the buffering solution over the freshly-rinsed coco until it is completely submerged. Stir the mixture.
- Cover the bucket with a lid. Let it sit for at least eight hours.
- After the soaking period, lift the fabric pot, shaking it vigorously to drain out the excess liquid. Once done, remove the fabric. Set aside.
- Throw away the contents of the bucket, then rinse it thoroughly with water.
- Place the fabric pot inside the newly-washed pail.
- Slowly pour a fresh batch of Cal-Mag solution over the coco. Again, stir, cover, and let it steep for eight hours.
- Repeat step 3.
- The coco is finally ready for use.
Step 5: Combining With Perlite (Optional)
Some growers may want to use coco coir as a standalone medium. For best results, you may want to combine it with perlite – white popcorn-like bits made from volcanic glass.
Perlite significantly boosts the water drainage and aeration of coco, preventing compaction and making it even harder to overwater. By improving the water flow through the substrate, you can also flush out excess salt better. Preparing the final mix is just a matter of blending the appropriate amounts of coco and perlite depending on the pot size, or how well-draining you want the media to be.
As a rule of thumb, refer to the ratios below:
| Container Size | Quantity of Growing Mix | Coco Coir Dry Weight | Perlite Percentage | Perlite Volume |
| 2-gallon | 2 gallons | 450 grams | 0-20% | 0-1 quart |
| 3-gallon | 3 gallons | 550 grams | 30% | 2 quarts |
| 5-gallon | 4 gallons | 650 grams | 40% | 4 quarts |
| 7-gallon | 5.5 gallons | 800 grams | 50% | 6 quarts |
| 10-gallon | 8 gallons | 1250 grams | 50% | 9 quarts |
How To Water Coco Coir
Coco coir is one of the most forgiving growing media when it comes to watering, making it a fantastic choice for beginners. Here are some of the things to keep in mind when irrigating it.
Watering Frequency
Cannabis plants grown in coco coir are typically drenched every one to two days, or when the top inch does not feel moist anymore. Another indicator is when the dark brown fibers start getting lighter in color. Weight is also a useful marker. It needs hydration if the container feels rather light when lifted gently.
Also, know that crops housed in air pots or smart pots will dry out faster, requiring more frequent watering.
Make sure never to let the medium become fully dry. In the same manner, do not let it become waterlogged or soaking wet all the time, which can lead to overwatering issues.
Watering Volume
When flooding the coco, ensure that there is always at least 10-20% runoff. This amount does not only hydrate the plants but also flushes out nutrient buildup, helping avoid nutrient burn. Toss out the runoff water right away.
If the medium dries out too fast – or in less than a day – try giving more water every session. Maintain the 10-20% runoff. If the problem persists, then you may want to consider transplanting the plants to a bigger container. More coco translates to higher moisture content, causing it to dry out more slowly.
On the other hand, if the medium is taking more than three days to dry, provide it with less water at a time. This rings especially true for younger cannabis plants. Wait until it matures before giving it more.
How To Reuse Coco Coir
Coco coir can be reused for up to three times. While reusing will help you save some precious bucks, know that it does require time and patience. The drying stage alone can take at least two weeks to finish. Fortunately, all the steps are straightforward and simple enough.
Also, keep in mind that coco coir becomes less porous and more moisture-retentive over time. As such, you will have to condition and amend it with the appropriate materials.
Step 1: Deciding On Whether To Reuse
Not all coco coir can be reused, and sometimes, discarding it may be more prudent. Before anything else, note its exposure to chemicals and pathogens, then check its structure.
If the coco has been exposed to fertilizers and/or pesticides packed with synthetic chemicals, do not reuse it. It may pass on toxic compounds not only to the future plants but to humans as well. Also, dispose of it immediately if it has a history of pest and pathogen attacks. Otherwise, it may contaminate the rest of the growing space.
If the coco tests negative for these two, then check its structure. It should have a decent texture and consistency. Also, over time, coco becomes more easily compacted and waterlogged. To avoid this, you may have to incorporate it into a new medium or mix rather than use it as is.
Step 2: Using Enzymes
The coco is bound to have some dead roots in it. If left alone, the old roots will later decay, releasing carbon dioxide, which could suffocate the future root system and invite harmful microorganisms.
Since it is impossible to remove the remaining roots manually, it is advisable to use enzymes to break down old roots. It is available in liquid and capsule form. Simply dissolve the appropriate amount in water, let it sit for a period, then use it to drench the substrate. Refer to the instructions manual for the best way to use it.
Step 3: Drying The Medium
This step entails allowing the coco to dry under the sun for at least two weeks to kill any remaining pests and weed seeds.
Begin by finding an outdoor spot that gets about eight hours of sunlight every day. Lay a tarpaulin in the chosen location, then dump the moist – not sopping wet – coco coir onto it. Spread it across the surface evenly. Afterward, cover the setup with a clear plastic tarp, securing the edges in place with boulders or large rocks. Let it cook under the sun for two to four weeks.
Step 4: Clearing Out The Debris
If you live in a moist region, coco coir may never dry thoroughly even after a few weeks. In this case, you will have to extract the remaining dirt from the damp material, which may take some time. Start by breaking apart the coco. Inspect it, then remove any stumps and debris by hand, including bag scraps, old plants, and large roots.
Step 5: Rehydrating
Simply grab a large bucket, then dump the coco into it. Fill the container with tap water. Squeeze the material so that the water can drench it thoroughly.
Step 6: Rinsing & Flushing The Medium
After the growing season, coco coir can get dusty. It is because the large fibers may eventually break down, forming coco pith or peat. These need to be removed, as any loose media and small bits will only interfere with optimal water and air retention balance, causing it to become waterlogged.
To do this, simply scoop the coco from the bucket using a perforated strainer or garden sieve. Then, hose it down with water to wash away the dust. Alternatively, you can do this step in the bathtub and use a shower head to rinse the medium.
This step also helps get rid of any leftover minerals, which can lead to nutrient problems later on. It also provides growers more or less a “blank slate” to work with, making it easier to know how much nutrients to feed the new plants.
Step 7: Re-Buffering The Coco
Again, make sure to re-buffer coco before use. It is just a matter of steeping it in a Cal-Mag solution for at least eight hours. After this, it is finally ready for reuse.
Should You Pasteurize Or Sterilize Coco Coir?
Some growing media need to be pasteurized or sterilized first before it can be reused, which is typically conducted after the drying process. Pasteurization kills most unwanted microflora (such as weed seeds and pathogens). In contrast, sterilization gets rid of all the living microorganisms left in the medium. It can be done chemically or thermally.
In the case of coco coir, though, there is debate on whether to sterilize it before reusing. Doing so, after all, will only not only destroy the harmful microbes in the medium but the beneficial fungi like Trichoderma and Mycorrhiza as well. For this reason, many growers advocate reusing coco without sterilization – but only if the medium has had no exposure to pests and pathogens.